Loop, pass, tighten — learn how to tie a fishing knot step by step in clear, repeatable moves.
I've tied hundreds of knots on rivers, lakes, and saltwater trips, so I know what works when you need a fast, strong connection. This guide walks you through how to tie a fishing knot step by step, with clear instructions, common mistakes, and real tips from time on the water. Read on to learn simple, proven knots and when to use them so your line and gear work together every cast.

Why knowing how to tie a fishing knot step by step matters
A good knot keeps fish, lures, and confidence on the line. Learning how to tie a fishing knot step by step prevents lost fish and snapped leaders.
Strong knots save time and money. A proper knot holds under load and resists slipping, which matters more than you think on a long fight.
Practice makes fast and steady hands. The more you tie, the easier "how to tie a fishing knot step by step" becomes when the action heats up.

Tools and line types to prepare before you tie
Choose the right tools. Keep scissors or nail clippers, a lighter for mono, and a pair of pliers nearby.
Know your line. Monofilament, fluorocarbon, and braided lines behave differently when you learn how to tie a fishing knot step by step. Mono stretches. Fluoro sinks and grips. Braid is slippery.
Match knot to use. Some knots shine with braid. Others work best with mono or fluoro. This matters when learning how to tie a fishing knot step by step.

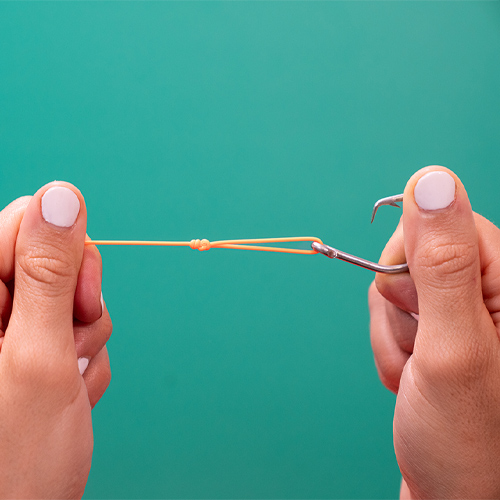
Improved Clinch Knot — step by step
When to use: attaching hooks, swivels, and small lures to mono or fluorocarbon.
- Thread the line through the eye. Pull 6–8 inches of tag end.
- Wrap the tag end around the standing line 5–7 times.
- Pass the tag end back through the small loop by the eye.
- Then pass it through the larger loop you just formed.
- Moisten the knot and pull the standing line slowly to tighten.
- Trim the tag end close to the knot.
This knot is simple and reliable. It’s a perfect knot to learn first when you practice how to tie a fishing knot step by step.
Palomar Knot — step by step
When to use: small hooks, swivels, and braided line. Very strong and quick.
- Double 6 inches of line and pass the loop through the hook eye.
- Tie a loose overhand knot with the doubled line.
- Pass the hook (or swivel) through the loop.
- Moisten the knot, pull both tag end and standing line evenly to tighten.
- Trim the tag end.
Palomar is my go-to for braid. It’s fast and keeps great strength when you need to tie a fishing knot step by step under pressure.

Uni Knot — step by step
When to use: versatile knot for line-to-line or line-to-hook, good for braid and mono.
- Pass the line through the eye and double back to form a loop alongside the standing line.
- Wrap the tag end around both lines 5–7 times.
- Pull the tag end to tighten the coils snug against the eye.
- Slide the knot down, moisten, and pull the standing line to set.
- Trim the tag end.
Uni can join two lines or secure a hook. Its flexibility makes it essential when learning how to tie a fishing knot step by step.

Blood Knot — step by step
When to use: joining similar diameter mono or fluoro to make leaders.
- Overlap 6 inches of each line and hold ends opposite each other.
- Wrap one tag end around the other line 5–7 times and tuck it back between the two lines.
- Repeat with the other tag end in the opposite direction.
- Moisten and pull both standing lines to slide the wraps together.
- Trim tag ends close.
Blood knot stays slim and strong for passing through guides. Learn this to join leaders when you practice how to tie a fishing knot step by step.

Non-Slip Loop — step by step
When to use: giving a lure free action or for live bait rigs.
- Form an overhand knot in the line but don’t tighten.
- Pass the tag end through the eye and then back through the overhand knot.
- Wrap the tag end around the standing line 3–4 times.
- Pass the tag end back through the overhand knot the same way again.
- Moisten and pull both ends to tighten and form a loop.
- Trim the tag end.
This creates a secure loop that lets a lure move naturally. It’s handy when you need freedom of motion and when you want to master how to tie a fishing knot step by step.
How to practice and test your knot
Practice with purpose. Tie each knot 10 times until your hands move without thinking. That repetition builds muscle memory.
Test knots with a steady pull. Grip the tag end and the standing line, then tug hard. A good knot slips slightly while snugging up, but it should not fail.
Check and re-tie before casting. Salt, dirt, and nicks weaken knots. Make a habit of retying if you suspect damage after a fight.
Common mistakes and troubleshooting when you tie a fishing knot step by step
Not moistening the knot before tightening can cause heat and weaken line fibers. Always wet the knot with saliva or water before the final pull.
Using too few turns on slippery braid leads to slippage. Add extra wraps with braid and consider a knot suited to braid, such as Palomar or double uni.
Cutting the tag too short leaves no safety tail. Leave a small stump—about 1/8 inch—so the knot won’t pull apart under pressure.
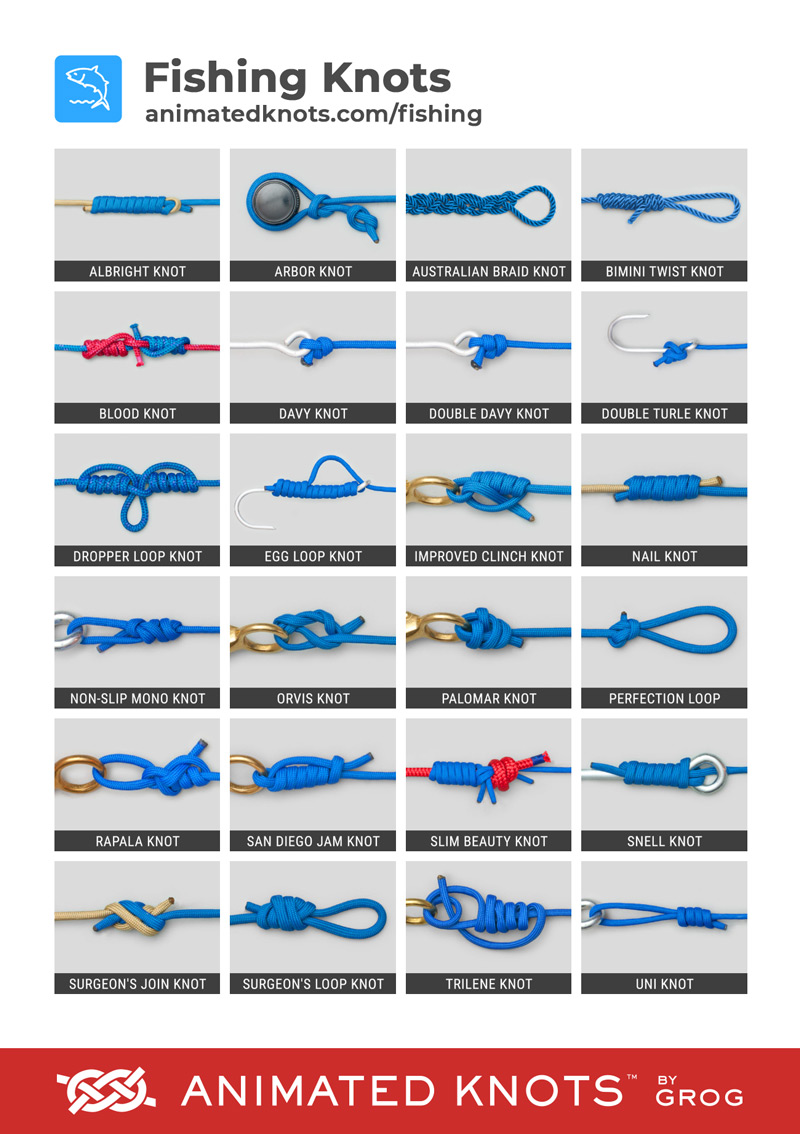
When to use which knot — quick guide
Improved Clinch: small hooks and general use with mono and fluoro.
Palomar: braid and high-strength needs; short and strong.
Uni: joining lines or tying to tackle; versatile for many situations.
Blood Knot: making leaders from two similar lines.
Non-Slip Loop: free-action lures and live baits.
Match knot choice to line type and target fish. That’s the heart of knowing how to tie a fishing knot step by step.
My real-world lessons and tips
After decades on the water, I learned a few things the hard way. First, re-tie leaders before a long trip; knots hide tiny cuts that grow under strain. Second, practice tying in the dark—most real bites come at dawn, not during perfect light.
I once lost a big bass because I clipped the tag too close after a quick tie. Since then I leave a small tag and I haven’t lost that kind of fish to knot failure again. These small choices are what make learning how to tie a fishing knot step by step truly pay off.
Quick checklist for tying a reliable fishing knot step by step
- Choose the right knot for line and tackle.
- Prepare 6–8 inches of tag end.
- Make the wraps as directed for the knot type.
- Moisten before the final pull.
- Tighten evenly and trim the tag with a small tail left.
- Test the knot with a firm pull before casting.
Use this checklist every time. It makes your routine fast and safe when you practice how to tie a fishing knot step by step.
Frequently Asked Questions of how to tie a fishing knot step by step
What knot is best for beginners learning how to tie a fishing knot step by step?
The Improved Clinch is the easiest to learn and works well for hooks and small lures with mono and fluoro. It gives a good mix of simplicity and strength.
Can I use the same knot for braid and mono?
Not always. Some knots like the Palomar work well with braid, while the Improved Clinch suits mono and fluoro better. Pick the knot that matches your line type.
How often should I re-tie my knots?
Re-tie knots if you catch a big fish, see damage, or after several casts with abrasive cover. As a rule, re-tie at the start of each trip for peace of mind.
How do I stop knots from slipping on braided line?
Use knots that add wraps around the standing line, such as Palomar or double uni, and add extra wraps when needed. A small drop of head cement can help but is usually unnecessary.
Is practice the only way to get better at tying knots?
Practice is the fastest way, but deliberate testing and learning from mistakes speeds progress. Try tying with your nondominant hand or in low light to simulate real conditions.
Conclusion
You can learn how to tie a fishing knot step by step by focusing on the right knots, practicing deliberately, and testing each tie before casting. Start with the Improved Clinch and Palomar, then add Uni and Blood knots as you gain confidence. Try these knots on short outings, note what works, and build a habit of checking your knots. Ready to tighten up your game? Practice now, leave a comment with your favorite knot, or subscribe for more fishing tips.